Oil Painting
Course Outline
Material/Resources
Value
Temperature
Color
Getting Started
Drawing
Edges
Brushwork
Compostion
Design
Elements
Principles
Supply List
Limited Palette: split primaries - warm and cool of each primary
Cadmium yellow light
Cad yellow medium
Cadmium red light
Alizarin red or magenta
Ultramarine blue
Cerulean blue
Titanium white

Color and Color Mixing
Objectives:
To learn to:
mix color
brighten color
dull color
shade (darken) color
tint (lighten) color
develop color schemes
arrange colors on your palette
keep
colors clean
Projects
Color Wheel
Value scale
Color swatches
Color charts
Color bias grids
Complementary color chart
Copy of favorite painting
Color Vocabulary
Primary
Secondary
Tertiary
Analagous
Complementary
Attributes:
Hue Value Intensity
Brushes
These will be good brushed to start. You will eventually need some bigger ones.
I use mostly flats. I like them because to me they are the most versatile and easiest to keep clean. Flat brushes have longer bristles so the paint doesn't get down into the ferrule (the metal part) as easily.
You will need both bristle and soft synthetic brushes in each size:
Sizes 4, 6, 8 (It would be great to get 10 and 12's, too.) The sizes vary according to company. I don't understand why there is not a universal sizing system for brushes. The bottom line is get small, medium and large brushes in both synthetic and bristle.
My favorite bristle brushes are the Robert Simmons Signet brushes. I like the Silver Bristion for the soft synthetic and I found some very inexpensive soft one called Qualita Angular Creative Mark. They have short handles, but they work well and if you get them on sale they are a great bargain.
Miscellaneous things you will need:
Small palette knife
palette paper
canvas boards
gamsol (odor free turpentine)
paper towels (I like Viva the best)
Tool you might want:
 ______
______________Available at this link_
#1 - First assignment
VALUE -: create a value chart - 10 increments from white to black. You can do this on poster board or even paper, but it is good to keep the value chart near your easel to be aware of values in your paintings.

Exercise to show how value creates form:
Paint same object 4 times going from weak value differences to strong value differences.

#2 -Color - get to know your paints
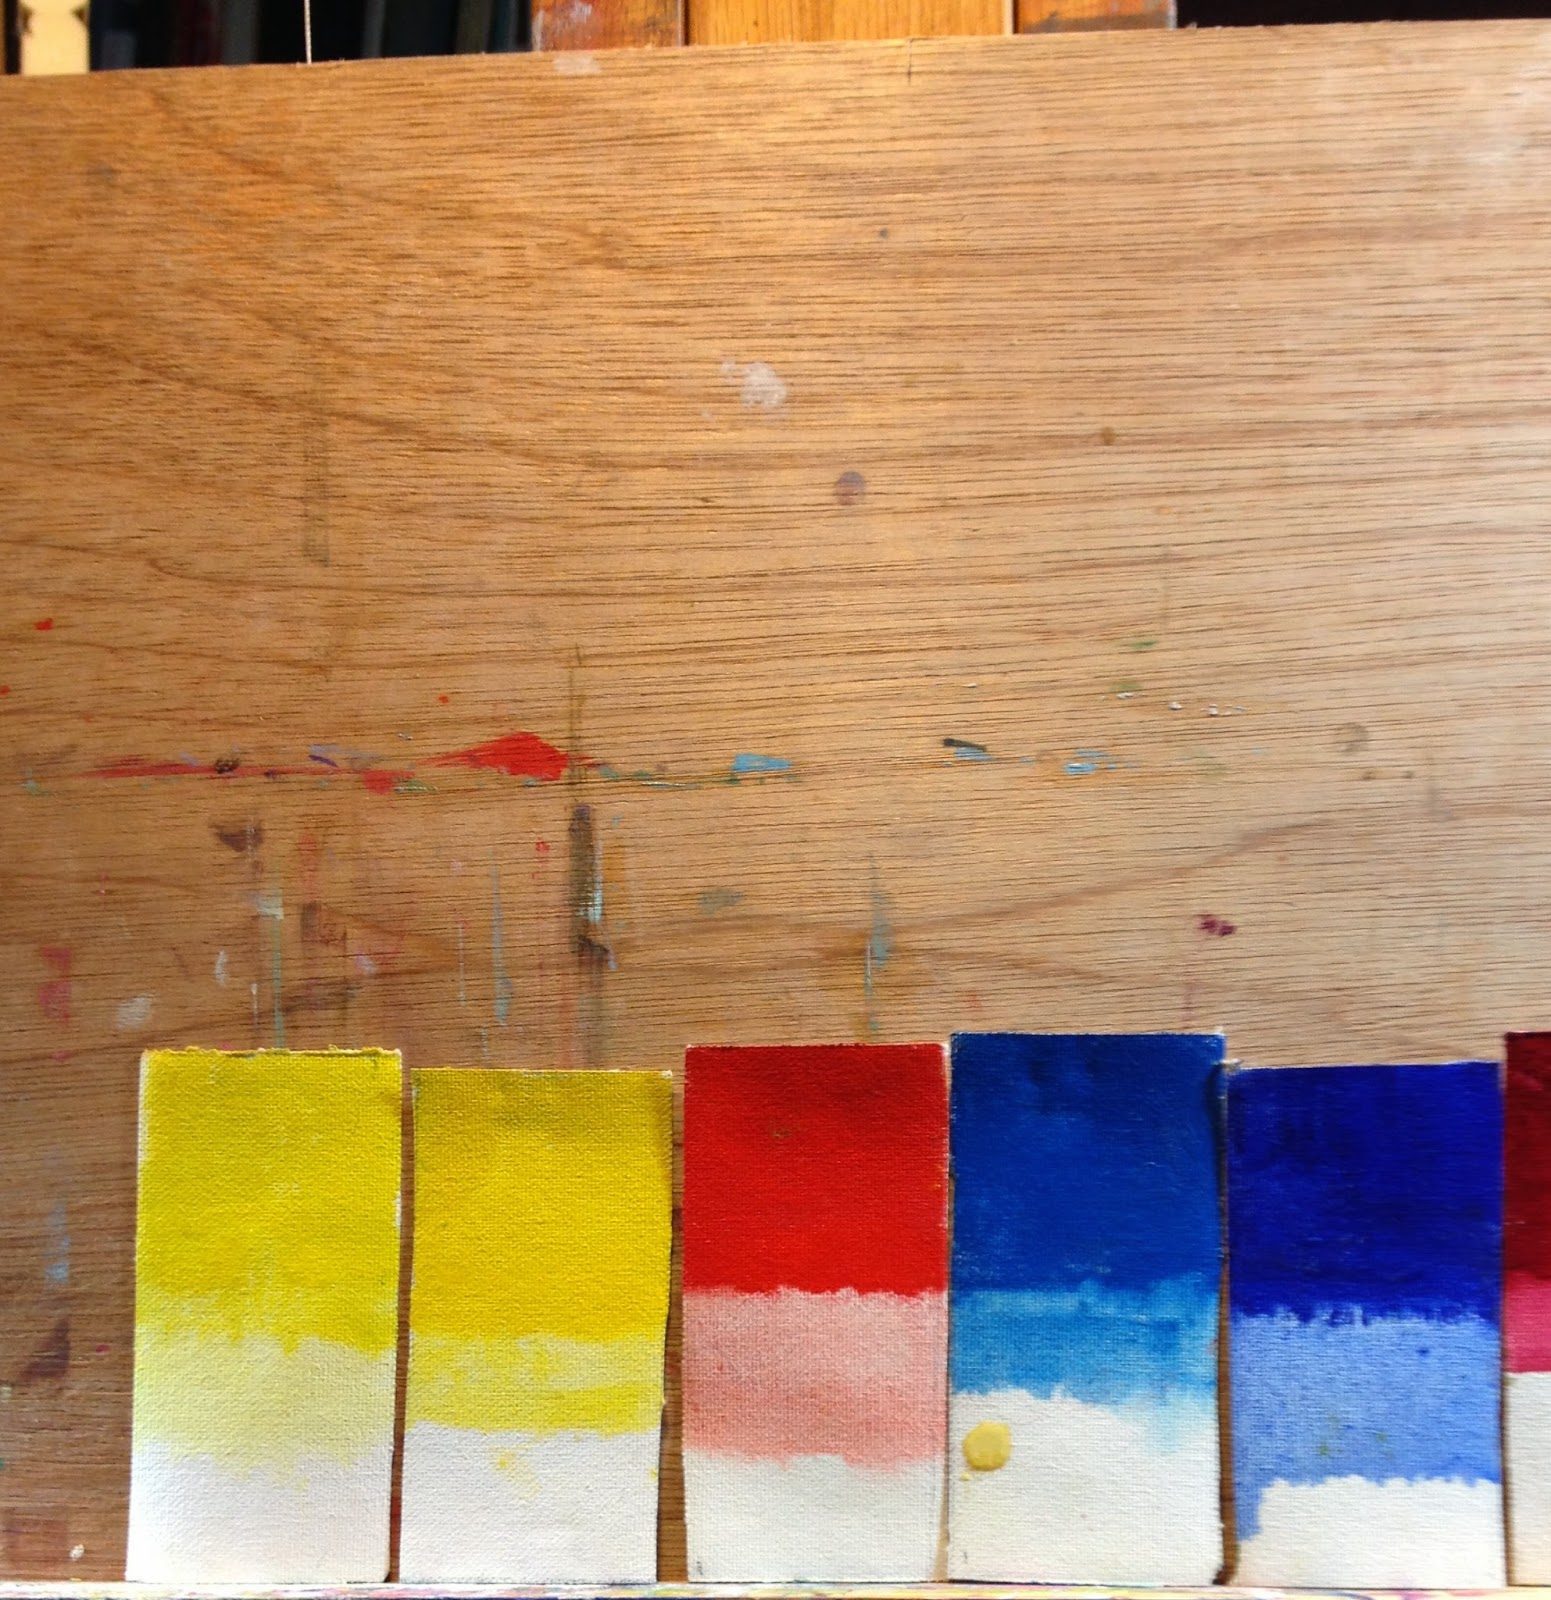
COLOR/Color Bias
(Temperature) - add photo of assignment


http://www.pinterest.com/pin/387942955372008380/ -click on this link to see color charts from Richard Schmid's book: Alla Prima
Temperature:

HOW TO START A PAINTING

This is just one of the ways to start a painting. I've used this exercise with students to show the stages of a painting. It could be done loosely with more deliberate brushwork.
lower left
1. Start with a wash of Ultramarine Blue and Burnt Sienna or anything that gives you a dark gray/black. Do a very loose drawing. Wipe out the lights with a paper towel
upper left
2. Next paint large shapes of light and dark with color in the values you did in Step 1. (start using opaque paint on the light side of the object, keep to transparent thin paint on the shadow side)
top right
3. Start refining the shapes of light and dark, add the mid-tones for the reflected light and where light meets dark on the apple.
bottom right
4. Refine even more, add the highlight, apply paint on background and foreground, work on edges to include some sharp edges and soft edges. Include some green in shadow.
The point of this exercise is to do the painting in layers. It also helps to maintain the darks if they are established first.
Hal Groat Demo - painting cherries
http://www.bing.com/videos/search?q=you+tube+hal+groat+painting+cherries&qpvt=you+tube+hal+groat+painting+cherries&FORM=VDRE#view=detail&mid=87AC097962CD2D9E4ACE87AC097962CD2D9E4ACE

Edges and Brushwork
BRUSHWORK and EDGES
Why is brushwork important?
It determines the "look" of the painting which is part of your style. Helps you create a painting that has soft and hard edges.
Gives your painting variety. Probably lots of other reasons.
PRACTICE:
Use your brushes in different ways. Use both bristle brush and soft brush to makes as many different shapes as possible: strait lines, wide lines, dots, etc., etc.
USE ALL PARTS of BRUSH
Flat side of brush
Corners
Edge
With bristle and soft brush
load the brush
drag the brush
lay the paint on thickly
thin paint
thick paint
use light pressure
use heavy pressure
Terms to know:
pentimento- scrape off the top layer of the painting and what is remaining will be a soft version of whatever you were painting. Often it looks better than what was there and that is because the edges are soft which is the way the eye sees and, therefore is it pleasing to look at.
scumbling- use opaque paint to paint over the underpainting and let parts of it show through.
glazing- mix TRANSPARENT paint with medium and paint over a layer that has dried. For example if you paint over a dry layer of blue with a glaze of yellow, the final layer will look green.

This painting shows a variety of edges.
https://www.youtube.com/watch?v=zwTN6KCQxbo
https://www.youtube.com/watch?v=D7ylxz_nvEY
https://www.youtube.com/watch?v=3hTJ__mXxZQ


No comments:
Post a Comment